Preventing Cracks in Concrete Patios: Long-Term Maintenance Tips That Actually Work
Reading time: 14 minutes
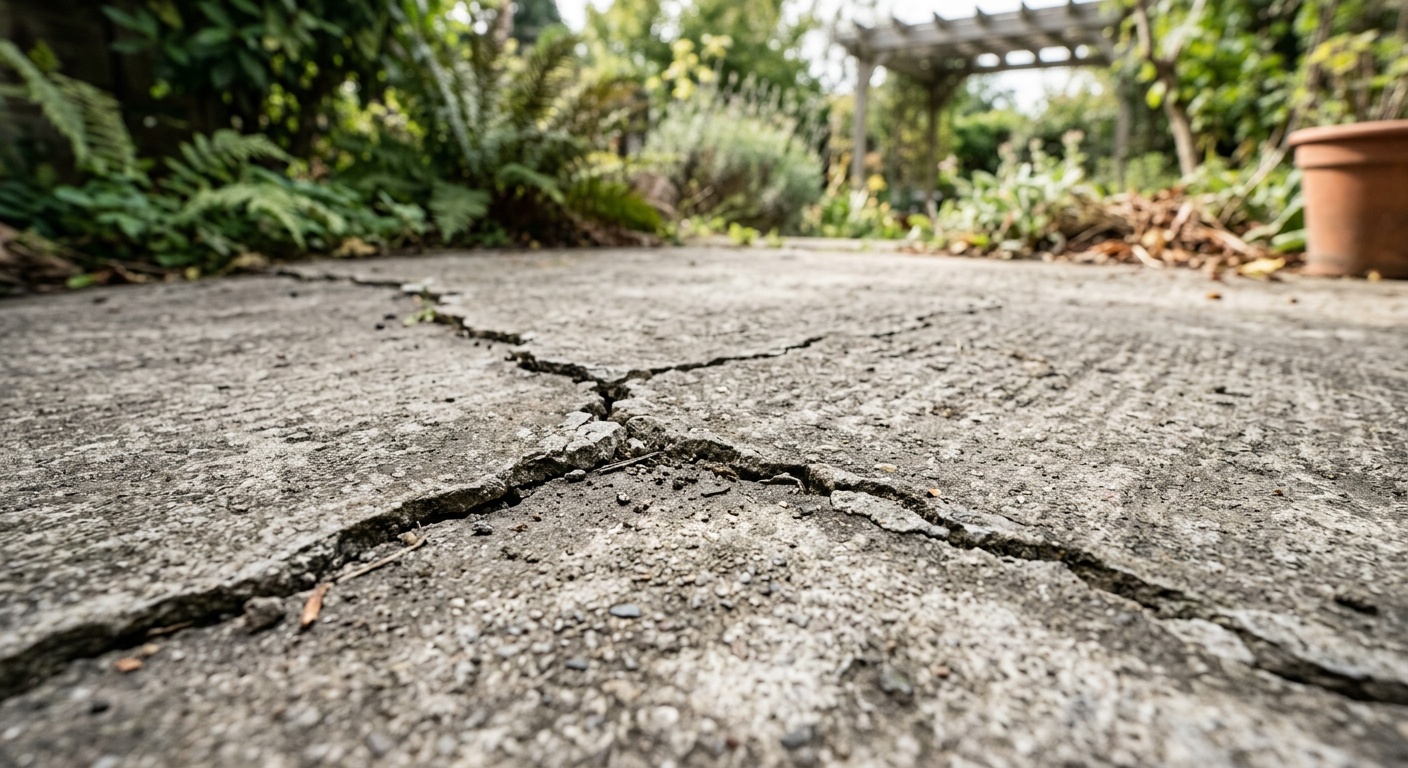
You step outside on a sunny morning, coffee in hand, only to notice a jagged crack running across your once-pristine concrete patio. Sound familiar? You’re not alone. In 2026, cracked concrete patios remain one of the most common — and frustrating — home maintenance headaches for homeowners across North America and beyond.
Here’s the straight talk: most patio cracks are entirely preventable. And even when cracks do appear, knowing how to respond quickly and correctly can be the difference between a minor repair and a complete patio overhaul costing thousands of dollars.
This guide cuts through the noise and gives you actionable, expert-backed strategies to protect your concrete patio for the long haul — whether you’re just installing a new one or trying to extend the life of an existing surface.
Table of Contents
- Why Concrete Patios Crack: The Root Causes
- Prevention Strategies: Getting Ahead of the Problem
- Sealing and Waterproofing: Your First Line of Defense
- Seasonal Maintenance: Adapting to Climate Demands
- Crack Repair vs. Full Replacement: Making the Right Call
- Concrete Crack Risk Factor Comparison
- Maintenance Methods Comparison Table
- Real-World Case Studies
- Frequently Asked Questions
- Your Patio Protection Roadmap: Next Steps
Why Concrete Patios Crack: The Root Causes
Before you can prevent something, you need to understand what’s causing it. Concrete cracks are not random acts of nature — they follow predictable patterns rooted in physics, chemistry, and environmental stress. According to the Portland Cement Association, approximately 72% of residential concrete issues reported in 2025 were attributed to inadequate site preparation, improper mix ratios, or insufficient curing time. These aren’t mysteries — they’re mistakes you can avoid.
The Big Four: Primary Causes of Concrete Cracking
1. Shrinkage During Curing
Concrete shrinks as it loses water during the curing process. This is completely natural, but without proper control joints — those intentional grooves cut into the slab — shrinkage stress has nowhere to go except into an uncontrolled crack. A slab that cures too quickly (from heat or wind) is especially vulnerable. Industry data from 2025 suggests slabs cured in temperatures above 90°F without adequate moisture retention experience cracking rates 3.5 times higher than those cured under controlled conditions.
2. Freeze-Thaw Cycles
Water is concrete’s nemesis in cold climates. When water penetrates tiny pores in the slab and freezes, it expands by approximately 9%, exerting tremendous internal pressure. Repeated freeze-thaw cycles — increasingly erratic in 2026 due to climate volatility — cause progressive surface spalling and subsurface fractures that worsen with each winter season.
3. Ground Movement and Settling
Soil erosion, tree root expansion, and inadequate base compaction cause the ground beneath your patio to shift. When the support beneath a slab moves unevenly, the concrete — which has little tensile strength — cracks under the bending stress. Clay-heavy soils that expand when wet and contract when dry are particularly notorious for this problem.
4. Heavy Loads and Impact Stress
Concrete patios are typically designed for pedestrian loads, not for heavy equipment or vehicles. Rolling a loaded wheelbarrow across a thin slab or parking a riding mower repeatedly in the same spot can cause point-load failures that develop into persistent cracks over time.
Secondary Contributors Worth Watching
Beyond the big four, several secondary factors accelerate concrete deterioration:
- Chemical exposure: De-icing salts and certain fertilizers break down the concrete matrix at a molecular level, causing surface scaling that precedes deeper cracking.
- Poor drainage design: Water that pools on or around a patio creates hydrostatic pressure and accelerates erosion of the base material.
- Tree roots: A mature tree within 10–15 feet of a patio can produce roots powerful enough to lift and fracture a 4-inch slab within 5–8 years.
- Low-quality concrete mix: A water-to-cement ratio that’s too high weakens the final slab significantly. The ideal ratio for outdoor slabs is typically between 0.45 and 0.50.
Prevention Strategies: Getting Ahead of the Problem
Think of concrete patio prevention as a three-phase mission: design right, pour right, maintain right. Skipping any phase dramatically increases your risk of costly repairs down the road.
Phase 1 — Design and Installation Best Practices
If you’re installing a new patio or overseeing a contractor’s work, these non-negotiables should be on your checklist:
- Proper base preparation: A minimum 4-inch compacted gravel base (6 inches in clay-heavy or frost-prone areas) is essential. This base provides drainage and stability that no amount of good concrete can compensate for without it.
- Control joint spacing: Cut control joints no more than 10 feet apart in either direction (a good rule of thumb is joint spacing in feet should equal 2–3 times the slab thickness in inches). For a 4-inch slab, joints every 8–10 feet is ideal.
- Correct concrete mix: Specify a minimum 4,000 PSI concrete mix for exterior flatwork. In northern climates, air-entrained concrete — which contains microscopic air bubbles that accommodate freeze-thaw expansion — is strongly recommended.
- Reinforcement: While not always required for residential patios, adding fiber reinforcement or a 6×6 welded wire mesh significantly improves crack resistance, especially in larger slabs.
- Slope for drainage: A 1/8-inch drop per foot away from the house ensures water doesn’t pool on the surface or against your foundation.
Phase 2 — Curing: The Often-Neglected Critical Window
Concrete doesn’t “dry” — it cures through a chemical hydration process that takes approximately 28 days to reach full strength. The first 7 days are the most critical. During this window:
- Keep the surface moist by misting with water 2–3 times daily or covering with wet burlap.
- Avoid pouring in extreme heat (above 90°F) or cold (below 40°F) without special precautions.
- Don’t allow any heavy foot traffic for at least 24–48 hours, and keep heavy loads off for a full week.
- Apply a curing compound if you can’t manage manual moisture retention — these seal the surface and trap moisture internally.
Pro Tip: According to the American Concrete Institute (ACI), properly cured concrete achieves up to 50% greater compressive strength than concrete that’s allowed to dry rapidly. That’s not a marginal difference — it’s the difference between a 20-year patio and an 8-year one.
Sealing and Waterproofing: Your First Line of Defense
If there’s one maintenance action that delivers the highest return on investment for concrete patio longevity, it’s regular sealing. A quality concrete sealer penetrates the surface pores and creates a barrier against water intrusion, chemical damage, and staining — addressing several root causes of cracking simultaneously.
Types of Concrete Sealers: Which One Is Right for You?
Not all sealers are created equal. Understanding the difference helps you make a smarter investment:
- Penetrating sealers (silane/siloxane): These soak into the concrete and chemically repel water without altering the surface appearance. They’re ideal for outdoor flatwork and last 5–10 years. Best choice for patios in freeze-thaw climates.
- Acrylic topical sealers: These form a thin protective film on the surface, enhancing color and providing decent water resistance. They require reapplication every 1–3 years but are budget-friendly and easy to apply.
- Epoxy and polyurethane sealers: Premium options that provide superior durability and chemical resistance. Ideal for patios that see heavy use or are exposed to harsh chemicals. Last 5–10 years with proper surface preparation.
Sealing Application Best Practices
- Wait at least 28 days after pouring new concrete before applying any sealer.
- Clean the surface thoroughly — pressure washing is ideal — and allow it to dry completely before application.
- Apply sealer in moderate temperatures (50–90°F) with low humidity for best adhesion.
- Use a pump sprayer or roller for even coverage, applying thin coats rather than one heavy coat.
- Reapply on a schedule: test with a water droplet — if water absorbs rather than beads, it’s time to reseal.
Seasonal Maintenance: Adapting to Climate Demands
Your concrete patio faces different threats with each passing season. A proactive seasonal maintenance routine — not unlike winterizing your car or preparing your garden — dramatically extends patio life and prevents small issues from becoming structural problems.
Spring: Assess and Repair
After winter, conduct a thorough inspection. Look for new cracks (especially hairline cracks wider than 1/8 inch), spalling, heaving, or joint damage. Spring is the ideal time for crack filling and resealing before summer sun and UV exposure compound any damage. Clean away any salt residue from winter de-icing as soon as possible — chloride ions left on the surface continue attacking the concrete matrix even after temperatures warm.
Summer: Protect from Heat and UV
High summer temperatures cause concrete to expand. If control joints are blocked by debris, this expansion has nowhere to go. Clean out joint material annually and refill with appropriate backer rod and caulk. Avoid pressure washing in the peak heat of the day, as thermal shock from cold water on a hot slab can cause surface micro-cracking. UV exposure also degrades topical sealers faster in summer — inspect sealer condition mid-season.
Fall: Prepare for Winter
This is your most critical maintenance window if you live in a frost-prone climate. Complete these tasks before the first frost:
- Fill and seal any cracks to prevent water infiltration and freeze-thaw damage.
- Apply or reapply a penetrating sealer if the surface hasn’t been treated in 3+ years.
- Clear vegetation from expansion joints — roots that enter joints during summer can expand aggressively once winter moisture swells them.
- Stock up on concrete-safe de-icing products. Traditional rock salt (sodium chloride) is highly damaging. Calcium magnesium acetate (CMA) is a gentler, increasingly popular alternative in 2026.
Winter: Minimize Damage
Shovel snow promptly to reduce prolonged moisture contact. Use de-icing products sparingly and only when necessary. Avoid using metal shovels that can chip or gouge the surface — plastic or rubber-edged blades are far gentler on sealed concrete.
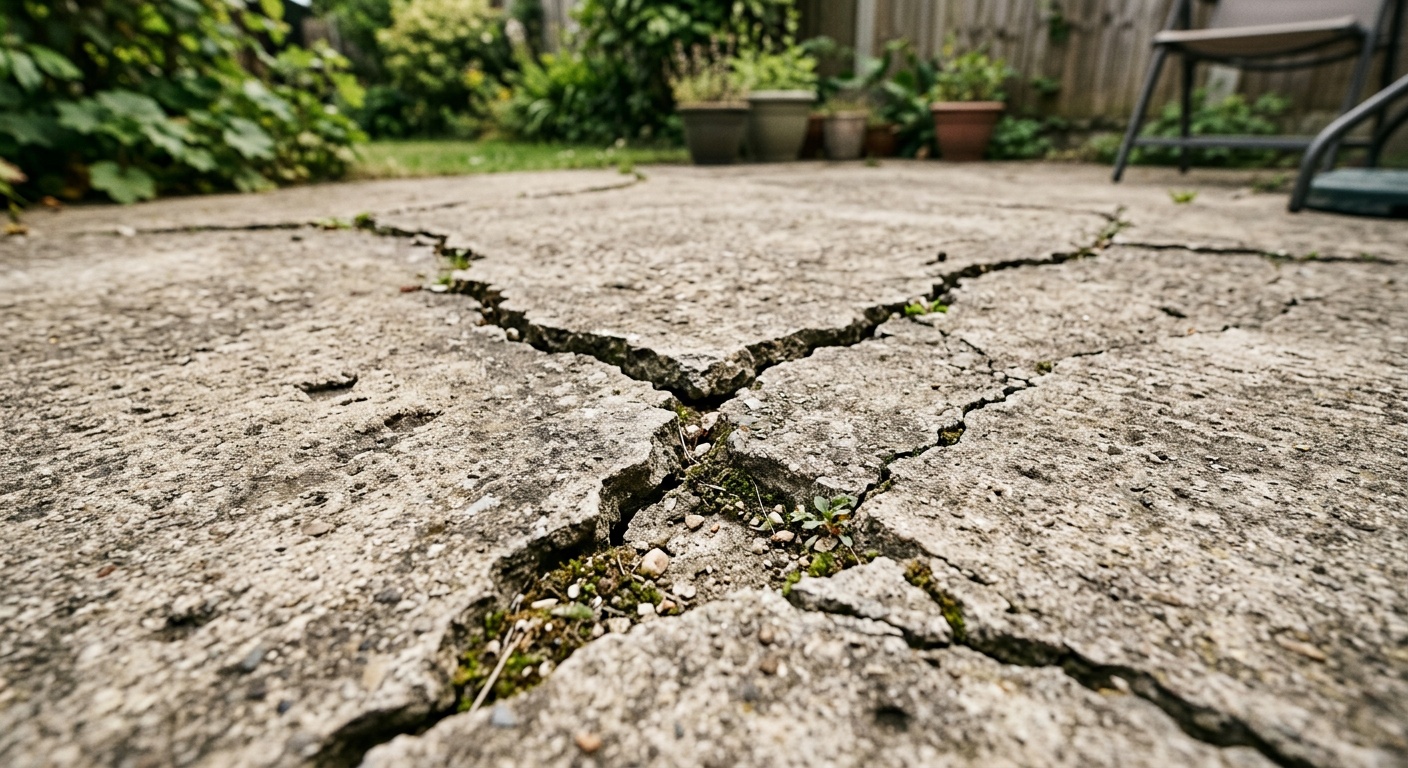
Crack Repair vs. Full Replacement: Making the Right Call
Not every crack signals a catastrophe — but knowing which cracks to repair and which indicate deeper structural failure is essential to making smart financial decisions.
When to Repair:
- Hairline cracks less than 1/4 inch wide with no vertical displacement
- Surface spalling affecting less than 25% of the total area
- Isolated cracks near edges that haven’t propagated in 6+ months
- Control joint failures where the joint itself has crumbled
When to Replace:
- Wide cracks (over 1/2 inch) with significant vertical displacement (one side higher than the other)
- Multiple interconnected cracks forming a “map cracking” or “alligator” pattern — this indicates base failure
- Heaving caused by tree roots that will continue to grow
- Slabs where more than 40% of the surface requires repair — at that point, replacement often costs less over a 10-year horizon
Cost Reality Check (2026 estimates): Professional crack injection repair for a standard residential patio runs approximately $300–$800 per session. A partial slab replacement (mudjacking or foam lifting) averages $500–$2,000. Full patio replacement in 2026 averages $8–$18 per square foot depending on region, meaning a 400-square-foot patio replacement could cost $3,200–$7,200. Preventive maintenance that costs $150–$400 annually suddenly looks like an excellent investment.
Concrete Crack Risk Factor Impact: Relative Contribution
The following chart illustrates the relative contribution of key risk factors to premature concrete patio cracking, based on aggregated contractor survey data from 2025:
Risk Factor Contribution to Premature Cracking (%)
Source: Contractor Survey Aggregated Data, 2025. Percentages reflect proportion of surveyed cases where the factor was a primary contributor.
Maintenance Methods Comparison Table
| Maintenance Method | Frequency | Avg. Cost (2026) | Effectiveness | DIY Friendly? |
|---|---|---|---|---|
| Penetrating Sealer Application | Every 5–7 years | $80–$200 (DIY) | ⭐⭐⭐⭐⭐ Very High | Yes |
| Acrylic Topical Sealer | Every 1–3 years | $40–$120 (DIY) | ⭐⭐⭐ Moderate | Yes |
| Crack Filling (Polyurethane Caulk) | As needed (annual check) | $15–$60 (DIY) | ⭐⭐⭐⭐ High | Yes |
| Professional Mudjacking / Foam Lifting | As needed | $500–$2,000 | ⭐⭐⭐⭐ High | No |
| Full Professional Inspection | Every 3–5 years | $150–$400 | ⭐⭐⭐⭐⭐ Very High | No |
Real-World Case Studies: What Actually Happens
Case Study 1 — The $12,000 Lesson in Denver, Colorado
In 2023, a Denver homeowner had a 500-square-foot concrete patio installed by a budget contractor. The base was only 2 inches of compacted gravel (half the recommended depth), no control joints were cut, and no sealer was ever applied. By the winter of 2024–2025, the patio had developed a network of interconnected cracks across 60% of the surface. The freeze-thaw cycles of two Denver winters had essentially destroyed the slab. Full replacement in early 2025 cost the homeowner $11,800 — nearly four times what a properly installed patio would have cost initially.
The lesson: Skimping on installation isn’t saving money — it’s deferring a much larger expense.
Case Study 2 — The Proactive Homeowner in Minneapolis, Minnesota
Compare the Denver story to a Minneapolis homeowner who installed a similar-sized patio in 2018. She invested in a proper 6-inch gravel base (essential in Minnesota’s harsh freeze-thaw climate), air-entrained concrete, properly spaced control joints, and has maintained a disciplined annual inspection and sealing schedule. As of 2026, her patio shows only minor surface hairline cracking at one control joint — normal and easily repaired with a $12 tube of polyurethane caulk. Her total maintenance investment over eight years: approximately $680. Her patio is expected to perform well into the 2030s with continued care.
The lesson: Consistent, modest investment in maintenance dramatically outperforms expensive reactive repairs.
Case Study 3 — The Tree Root Catastrophe in Atlanta, Georgia
A 2025 report from a Georgia-based concrete contractor highlighted a recurring pattern: homeowners who install patios within 8–12 feet of established oak or maple trees without root barriers. In one documented case, a 15-year-old patio near a large oak had been lifted nearly 3 inches on one side and fractured into multiple sections. The repair required removing a portion of the tree’s root system, installing root barriers, and replacing 40% of the slab — a $4,500 project that could have been avoided with a $200 root barrier installation during the original pour.
The lesson: Account for the living environment around your patio, not just the concrete itself.
Frequently Asked Questions
How soon after I notice a crack should I repair it?
The short answer: as soon as possible, ideally within the same season you notice it. Even a hairline crack creates an entry point for water. Once water infiltrates and goes through one freeze-thaw cycle, what was a 1/16-inch crack can widen to 1/4 inch within a single winter. In warmer climates, water and biological growth (moss, weeds) entering cracks accelerate base erosion underneath the slab. A $15 tube of polyurethane crack filler applied promptly can prevent a repair that costs 100 times more. Don’t wait for your annual inspection if you spot a crack — address it immediately.
Can I use regular sand or cat litter instead of concrete-safe de-icing products?
Yes — and this is actually a smart strategy. Sand and kitty litter provide traction without the chemical damage that sodium chloride (rock salt) causes to concrete surfaces. In 2026, many municipalities across Canada and the northern United States have already switched to concrete-safer alternatives like calcium magnesium acetate (CMA) or magnesium chloride, which are far less damaging than traditional rock salt. If you must use a chemical de-icer, avoid sodium chloride and potassium chloride on concrete patios. Products labeled “concrete safe” typically use calcium magnesium acetate or are sodium-chloride-free. Rinse the surface thoroughly as temperatures allow in late winter to remove any residual chemical buildup.
How do I know if my patio needs a professional inspection versus DIY assessment?
DIY assessment works well for surface-level concerns: minor hairline cracks, surface spalling, joint deterioration, or sealer wear. You can manage these yourself with readily available products. However, you should call a professional concrete contractor when you observe: cracks wider than 1/2 inch, any vertical displacement between sections (one side higher than the other), slab sections that rock or feel unstable underfoot, widespread cracking patterns that resemble alligator skin or a road map, or water pooling beneath the slab (indicated by settling or a hollow sound when tapped). In 2026, many concrete contractors also offer drone or infrared thermal imaging assessments that can identify subsurface voids and base failures invisible to the naked eye — a worthwhile investment for patios over 10 years old.
Your Patio Protection Roadmap: Concrete Steps Forward
Here’s where knowledge becomes action. Your concrete patio isn’t just functional outdoor space — it’s a long-term investment in your home’s value and your quality of life. In 2026, with material costs and labor rates higher than they’ve been in a decade, protecting what you already have has never made more financial sense.
Follow this practical implementation roadmap:
- This week: Walk your patio and conduct a full visual inspection. Note any cracks, spalling, joint damage, or areas where water pools. Photograph everything with timestamps — this creates a baseline for tracking changes over time.
- This month: Address any active cracks immediately with appropriate filler. If you haven’t sealed in 3+ years, test water bead behavior and schedule a sealing day when temperatures are between 50–80°F.
- This season: Perform the appropriate seasonal maintenance actions — fall prep before frost, spring assessment after thaw. Build these into your home maintenance calendar as non-negotiable annual tasks.
- This year: If your patio is 10+ years old, invest in a professional structural assessment. The cost is minimal compared to the information it provides and the repairs it may help you avoid.
- Long-term: Establish a 5-year maintenance budget. Allocating $200–$400 annually for preventive maintenance on a $5,000–$10,000 patio is a 4–8% annual protection investment — arguably one of the best ROI decisions in home ownership.
As climate patterns continue to shift in 2026 and beyond — with more intense freeze-thaw cycles, heavier precipitation events, and prolonged heat waves — the demands on residential concrete structures are only increasing. The homeowners who adapt their maintenance strategies to these new realities will see dramatically better outcomes than those relying on advice written for more stable climate conditions of past decades.
Here’s a thought to leave you with: Every crack you prevent is a story of foresight, not just maintenance. Which story will your patio tell five years from now — the one where you acted early, or the one where you wish you had?