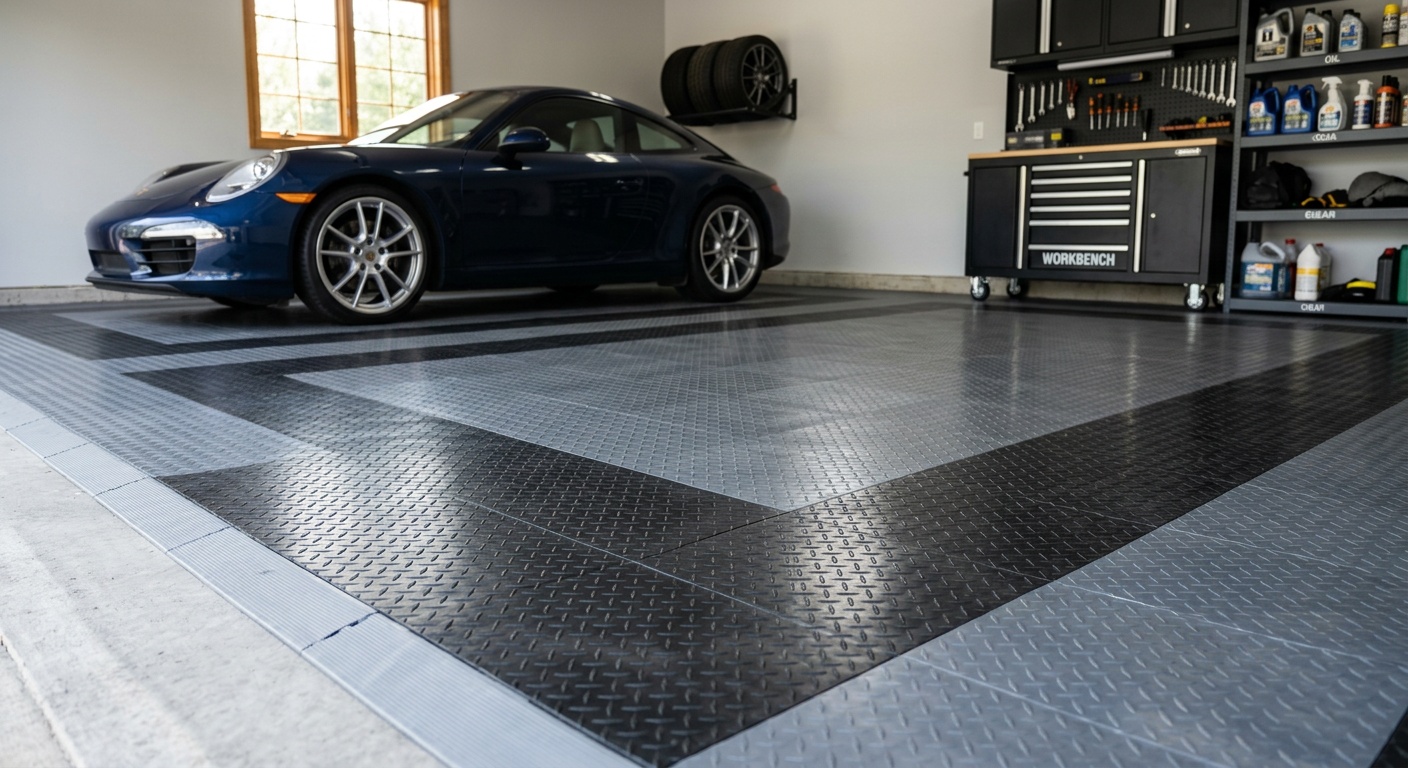
Tile vs Concrete Flooring: Best Choice for Garage Floors
Reading time: 12 minutes
You’ve finally decided to upgrade your garage floor. Maybe the bare slab is cracking, oil stains are becoming impossible to ignore, or you simply want a space that looks as good as it functions. Whatever your motivation, you’re now facing one of the most debated decisions in home improvement circles: tile or concrete flooring?
Here’s the straight talk: there’s no single “best” answer—but there is a best answer for your specific situation. This guide cuts through the noise, delivering practical, honest analysis so you can invest your money and effort wisely in 2026.
Table of Contents
- The Big Picture: Understanding Your Options
- Concrete Flooring Deep Dive
- Tile Flooring Deep Dive
- Head-to-Head Comparison
- Cost & Performance at a Glance
- Real-World Scenarios & Case Studies
- Common Challenges and How to Solve Them
- Frequently Asked Questions
- Making Your Final Decision: A Practical Roadmap
The Big Picture: Understanding Your Options
In 2026, homeowners are spending more time than ever in their garages. According to a 2025 report by the National Association of Home Builders, nearly 68% of American homeowners now use their garage as a multipurpose space—workshop, home gym, storage hub, or even a home office overflow. That shift has dramatically raised the stakes on flooring decisions.
When we talk about “concrete flooring” for garages, we typically mean one of three things: raw sealed concrete, epoxy-coated concrete, or decoratively stained/polished concrete. When we talk about “tile,” we usually mean either ceramic tile, porcelain tile, or the increasingly popular interlocking vinyl/rubber garage tiles.
Both options have passionate advocates and legitimate drawbacks. The goal here isn’t to declare a winner outright—it’s to help you identify which solution aligns best with your budget, usage habits, climate, and long-term vision for the space.
Concrete Flooring Deep Dive
Types of Concrete Garage Flooring
Most garages already have a concrete slab, so for many homeowners, “choosing concrete” really means choosing how to finish that existing slab. Here are the most common approaches in 2026:
- Sealed Concrete: A clear penetrating sealer applied directly to the bare slab. Budget-friendly and easy to maintain, but provides minimal protection against heavy impact or harsh chemicals.
- Epoxy Coating: A two-part resin system bonded to the concrete surface. As of 2026, water-based epoxy formulations have improved dramatically, offering better moisture tolerance and faster cure times than earlier generations.
- Polyurea/Polyaspartic Coating: The premium evolution of epoxy. These coatings cure in as little as 24 hours (compared to 72+ for traditional epoxy), resist UV yellowing, and handle temperatures from -30°F to 140°F. Professional installation typically runs $4–$8 per square foot in 2026.
- Polished Concrete: Ground and polished to a high sheen using diamond tooling. Increasingly popular for workshop aesthetics, but can be slippery when wet.
- Stained Concrete: Acid or water-based stains create color variation. Attractive and unique, but requires resealing every 2–4 years.
The Pros and Cons of Concrete
Advantages:
- Durability: Properly finished concrete can last 20–30 years with minimal maintenance. Polyurea coatings tested in 2025 by the Concrete Decor Institute showed less than 3% surface degradation after simulated 15-year wear cycles.
- Seamless surface: No grout lines means nowhere for oil, dirt, or bacteria to hide. One continuous surface is dramatically easier to clean after automotive work.
- Load capacity: Concrete handles virtually unlimited weight. Running a car lift, parking heavy trucks, or storing industrial equipment? Concrete doesn’t flex, shift, or crack under load the way some tile systems might.
- Cost efficiency: If you’re working with an existing slab, epoxy coatings typically run $2–$6 per square foot installed—significantly less than most tile options.
- Chemical resistance: Modern polyurea coatings resist motor oil, gasoline, brake fluid, and most degreasers without staining.
Disadvantages:
- Moisture vulnerability: Untreated or poorly sealed concrete is highly porous. Hydrostatic pressure (water pushing up through the slab) can cause delamination of coatings and persistent dampness.
- Hard underfoot: Standing on concrete for hours during a workshop project causes significant fatigue. Anti-fatigue mats help, but they’re an extra cost and can shift around.
- Crack propagation: Existing cracks in the slab will eventually reflect through most coatings without proper prep work.
- Commitment: Removing an epoxy or polyurea coating is labor-intensive and expensive. It’s not a decision you want to reverse quickly.
Tile Flooring Deep Dive
Types of Garage Tile Flooring
The tile category for garage floors has expanded significantly. In 2026, you have more options than ever:
- Ceramic and Porcelain Tile: Traditional hard tiles that require a properly prepped concrete substrate and grout lines. Porcelain (with a water absorption rate below 0.5%) is far superior to ceramic for garage environments.
- Interlocking Rigid Vinyl Tile (RVT): Perhaps the fastest-growing segment. Brands like RaceDeck, Swisstrax, and G-Floor have refined their products; 2025–2026 models feature improved load ratings (some up to 70,000 lbs per tile) and more realistic stone/wood aesthetics.
- Rubber Tile: Excellent for gym-style garages. Highly cushioned, noise-dampening, and slip-resistant, but less aesthetically versatile.
- Stone-Look Porcelain Pavers: Trending heavily in 2026 for “luxury garage” builds. Large-format 24″×24″ or 24″×48″ tiles create a showroom look, though installation is complex and costly.
The Pros and Cons of Tile
Advantages:
- Aesthetic versatility: Tiles come in hundreds of colors, patterns, and textures. Interlocking tiles in particular allow creative checkerboard, racing stripe, or company logo patterns.
- Modularity: Damaged tiles can be replaced individually. No need to redo the entire floor if one section gets chipped or stained beyond recovery.
- DIY-friendly installation: Interlocking vinyl tiles require no adhesive, no special tools, and no professional expertise. A 400 sq ft garage can be tiled in a weekend.
- Comfort: Vinyl and rubber tiles provide measurable cushioning. A 2025 ergonomics study from the University of Michigan’s Industrial and Operations Engineering department found that workers on interlocking vinyl surfaces reported 31% less foot fatigue over 4-hour standing periods compared to coated concrete.
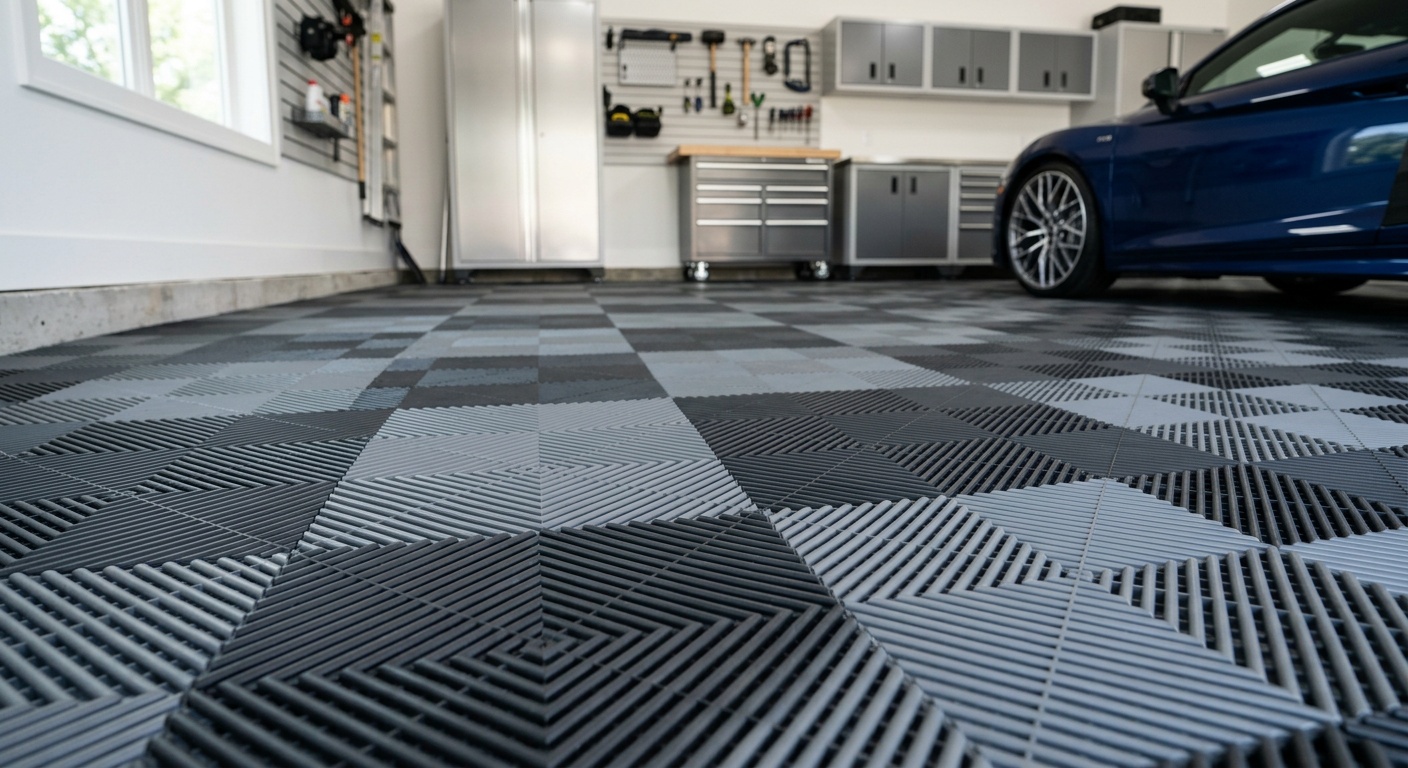
- Raised design advantage: Many interlocking tiles have a raised grid or coin pattern underneath, allowing air circulation and water drainage. This is a significant benefit in humid climates or garages prone to moisture intrusion.
Disadvantages:
- Grout line maintenance (hard tiles): Porcelain and ceramic tiles installed with grout are notoriously difficult to keep clean in a garage environment. Oil and grime penetrate grout rapidly.
- Cost variability: High-quality porcelain tile systems for garages can cost $8–$15+ per square foot installed. Even premium interlocking vinyl tiles run $3–$7 per square foot for materials alone.
- Movement under load: Interlocking tiles can shift, separate, or flex under very heavy rolling loads (like floor jacks with wide wheels). This is improving but remains a concern for serious automotive workshops.
- Temperature sensitivity: In extreme cold climates, some vinyl tiles become brittle. In extreme heat, they can expand and buckle slightly.
Head-to-Head Comparison
| Metric | Epoxy/Polyurea Concrete | Interlocking Vinyl Tile | Porcelain Tile |
|---|---|---|---|
| Average Cost (installed, 2026) | $3–$8/sq ft | $4–$9/sq ft | $8–$18/sq ft |
| Durability (lifespan) | 15–25 years | 10–20 years | 20–30+ years |
| DIY Feasibility | Moderate (prep is critical) | High (snap-together) | Low (professional recommended) |
| Chemical Resistance | Excellent (polyurea) | Good | Excellent (tile) / Poor (grout) |
| Comfort & Fatigue Resistance | Poor (hard surface) | Very Good | Poor (hard surface) |
Cost & Performance at a Glance
The following chart compares overall value scores (out of 100) across key performance categories for each flooring type, based on aggregated homeowner satisfaction data from the 2025 Home Improvement Insight Survey (n=4,200 respondents).
Overall Value Score by Category (Out of 100)
Epoxy/Polyurea Concrete — Ease of Cleaning
Interlocking Vinyl Tile — Comfort & Ergonomics
Porcelain Tile — Long-Term Durability
Interlocking Vinyl Tile — DIY Installation
Epoxy/Polyurea Concrete — Cost Value
Real-World Scenarios & Case Studies
Case Study 1: The Automotive Hobbyist in Phoenix, Arizona
Marcus T., a mechanical engineer and weekend car restorer in Phoenix, spent $2,400 in early 2025 coating his 480 sq ft garage with a professional polyurea system. His primary concerns were chemical spills, heat (his garage regularly hits 105°F in summer), and the need for a seamless surface that could be hosed down after messy engine work.
Eighteen months later, Marcus reports zero delamination, no color fade despite intense UV exposure, and cleaning that takes under 10 minutes. “The polyurea was the obvious call for my use case,” he says. “I tried interlocking tiles in my previous house and the gaps collected fluid and grit constantly.” His only regret? Not grinding down an existing crack beforehand, which has since reflected faintly through the coating.
Lesson: For heavy automotive use in hot climates, polyurea-coated concrete is a near-perfect solution—provided the slab is properly prepped.
Case Study 2: The Multi-Use Family Garage in Portland, Oregon
Sarah and James K. in Portland wanted a garage that could serve as a kids’ play area, home gym, and occasional parking spot. Their 550 sq ft garage had a moisture problem—a clear barrier test showed significant vapor transmission from the slab. Epoxy was immediately ruled out due to the moisture risk.
In spring 2026, they installed interlocking polypropylene tiles with a coin-top texture across the entire space, spending approximately $1,900 in materials for a self-completed installation over a three-day weekend. The raised tile design allows moisture to pass beneath rather than being trapped. Their gym corner uses rubber-topped tiles for cushioning; the parking bay uses heavy-duty polypropylene for chemical resistance.
“We love that we can reconfigure sections,” Sarah notes. “When we needed to do slab repairs in one corner last fall, we just popped up tiles, fixed it, and snapped them back.”
Lesson: Interlocking tiles shine in moisture-affected garages and multipurpose environments where flexibility and DIY accessibility matter.
Case Study 3: The Luxury Showroom Garage in Scottsdale, Arizona
A custom home builder in Scottsdale completed a client project in 2026 featuring 24″×48″ large-format porcelain pavers with epoxy-grouted joints in a four-car showroom garage. Total flooring cost: approximately $14,200 for 720 sq ft. The aesthetic is genuinely stunning—magazine-worthy. The owner stores classic cars and rarely drives in the space.
The critical caveat? Epoxy grout, which resists staining, was specified (standard grout would have been a maintenance nightmare). The slab was reinforced prior to tile installation due to the weight. This is a solution for those prioritizing aesthetics above all else and with the budget to match.
Lesson: Porcelain tile with epoxy grout can deliver unmatched beauty in the right context—but requires professional installation and significant investment.
Common Challenges and How to Solve Them
Challenge 1: Moisture and Vapor Transmission
This is the number one reason coatings fail and tiles buckle. Before committing to any flooring system, conduct a simple plastic sheet test: tape a 12″×12″ piece of plastic sheeting to the bare concrete slab, seal all edges with tape, and leave it for 24–48 hours. If moisture collects underneath, you have a vapor transmission problem.
Solutions: For concrete coatings, apply a moisture-mitigating primer (products like Sherwin-Williams ArmorSeal or Rust-Oleum EpoxyShield Moisture Stop 2026 edition can handle up to 95% relative humidity). For tiles, choose an interlocking system specifically designed with a drainage layer—these are the only tile products that should be used over problematic slabs without additional waterproofing.
Challenge 2: Existing Cracks and Surface Damage
No coating or tile system can permanently hide structural cracks. In fact, applying a rigid coating over an active crack is almost guaranteed to result in visible failure within 12–24 months.
Solutions: Fill active cracks with a polyurethane or epoxy crack injection system before coating. For wider cracks (>1/4 inch), consult a structural engineer—this may indicate settlement issues that flooring won’t fix. With interlocking tiles, cracks are less critical since the tiles span over minor imperfections, but severe unevenness (>3/8″ over 10 feet) should be ground or patched first.
Challenge 3: Budget vs. Long-Term Value
Many homeowners make the mistake of choosing the cheapest immediate option without calculating total cost of ownership. A $1.50/sq ft water-based epoxy kit from a big-box store might seem like a bargain—but most professionals report re-coating is needed within 3–5 years in high-use environments, compared to 10–15 years for professional-grade polyurea.
Pro Tip: Calculate cost per year of service life rather than upfront cost. A $6/sq ft polyurea system lasting 15 years costs $0.40/sq ft/year. A $2/sq ft budget epoxy needing recoating every 4 years costs $0.50/sq ft/year—and involves repeated labor and disruption.
Frequently Asked Questions
Can I install tile directly over an existing epoxy-coated concrete floor?
In most cases, yes—but with important caveats. The existing epoxy coating must be fully adhered with no delamination, bubbling, or peeling. If you’re installing interlocking vinyl tiles, they sit over the surface without adhesive, so a sound epoxy floor works perfectly as a substrate. For mortar-set porcelain tiles, you’ll need to assess whether the epoxy surface is compatible with the thin-set adhesive you’re using; many modern thin-sets bond adequately to existing coatings, but mechanical abrasion (sanding) of the epoxy surface first is strongly recommended for adhesion reliability.
Which flooring option is better for cold climates with freeze-thaw cycles?
This is one of the most important climate-specific questions for garage flooring. Traditional epoxy coatings perform poorly in garages that are not temperature-controlled and experience repeated freeze-thaw cycles, as the expansion and contraction of the concrete slab can cause delamination over time. Polyurea coatings handle this significantly better due to their flexibility. Interlocking vinyl tiles can become brittle below -10°F but generally manage moderate cold well. Polypropylene interlocking tiles actually perform better than vinyl in extreme cold. For climates like Minnesota, Wisconsin, or similar regions, polyurea coating or polypropylene interlocking tiles are the top two recommendations heading into the 2026–2027 winter season.
How long does each type of flooring take to install and when can I drive on it?
Installation timelines vary significantly. A DIY interlocking tile installation on a standard two-car garage (400–500 sq ft) typically takes 6–12 hours, and you can drive on it immediately upon completion. Professional epoxy systems require 24 hours of surface prep (grinding, patching), then 24–48 hours of cure time before foot traffic, and 72 hours before vehicle traffic—meaning the garage is out of commission for roughly 4–5 days total. Polyurea systems cure much faster: typically 24 hours to full vehicle traffic. Mortar-set porcelain tile is the most time-intensive: installation takes 2–4 days, grout cure adds another 24–72 hours, and sealing adds time, meaning a full project can take 5–10 days with 7+ days before parking vehicles on it.
Making Your Final Decision: A Practical Roadmap
As garage spaces continue evolving in 2026—functioning simultaneously as workshops, gyms, creative studios, and storage hubs—your flooring decision is more consequential than ever. Here’s your actionable roadmap to a decision you’ll be happy with years from now:
- Assess your slab first. Conduct the moisture test, identify existing cracks, and measure levelness before pricing any flooring system. The condition of your slab will eliminate some options naturally.
- Define your primary use case. Heavy automotive work → polyurea concrete. Multipurpose family space → interlocking tile. Showroom aesthetics with budget → large-format porcelain. Gymnasium → rubber tile. Be honest about how the space is actually used, not how you hope it will be used.
- Calculate total cost of ownership. Use the per-year formula: total installation cost ÷ expected lifespan in years. Include reapplication costs for coatings when relevant.
- Match your DIY skill level to the system. Interlocking tiles are forgiving and reversible. Concrete coatings punish poor surface preparation severely. Be honest about your skills and time availability.
- Get at least two professional quotes if coating. The polyurea/epoxy contractor market varies wildly in quality. In 2026, the Garage Flooring Association reports that roughly 35% of coating failures are due to inadequate contractor surface prep rather than product failure itself. Verify credentials and request references for installations at least 3 years old.
The garage floor revolution is real—by 2027, analysts at Grand View Research project the residential garage flooring market will exceed $1.8 billion annually in North America alone, driven by the multi-use garage trend. The products available today are genuinely excellent, with options to fit every budget, climate, and lifestyle.
Your floor is an investment in how you live—not just where you park. Whether you’re rolling beneath a classic car on polyurea-coated concrete or bouncing between gym equipment on cushioned interlocking tiles, the right choice is the one that meets your actual life head-on. So—what does your garage really need to become?
About the Author
