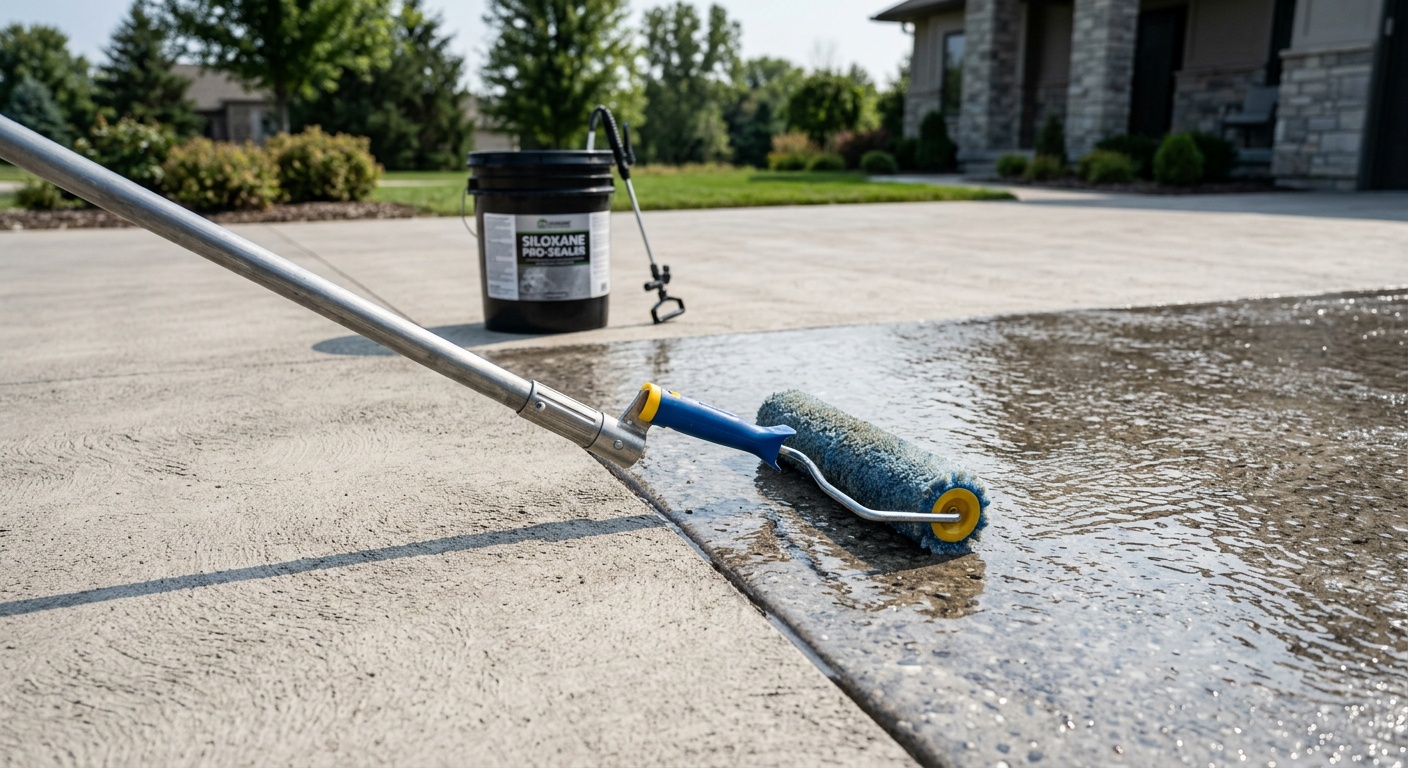
How to Seal and Clean Outdoor Concrete Floors Like a Pro
Reading time: 14 minutes
Ever looked at your driveway, patio, or pool deck and thought, “Why does this look so dull and stained when it used to look great?” You’re not alone. Millions of homeowners across the U.S. deal with weathered, cracked, or discolored outdoor concrete every single year — and most of them are using the wrong products, the wrong techniques, or skipping steps that matter enormously.
Here’s the straight talk: Sealing and cleaning outdoor concrete isn’t rocket science, but it’s not as simple as hosing things down and calling it a day. Done right, it can extend your concrete’s lifespan by 15–25 years, dramatically improve curb appeal, and save you thousands in premature resurfacing costs. Done wrong, you’re left with a peeling, blotchy mess that looks worse than what you started with.
This guide gives you the precise, pro-level roadmap — from surface assessment to final sealer coat — so you walk away with outdoor concrete that looks professionally done, because it will be.
Table of Contents
- Why Sealing Outdoor Concrete Actually Matters in 2026
- Understanding Concrete Sealer Types
- Tools and Materials You’ll Actually Need
- The Pro-Level Cleaning Process
- How to Seal Outdoor Concrete Like a Professional
- 3 Common Challenges (and How to Beat Them)
- Sealer Comparison Table
- Effectiveness by Sealer Type: Visual Breakdown
- Frequently Asked Questions
- Your Pro Concrete Action Plan: What to Do This Weekend
Why Sealing Outdoor Concrete Actually Matters in 2026
Outdoor concrete is one of the most resilient building materials on the planet — but it has a critical weakness: it’s porous. Without a proper sealant barrier, water, oil, UV radiation, freeze-thaw cycles, and chemical exposure slowly destroy the matrix of even high-quality concrete mixes.
According to the Portland Cement Association’s 2025 Infrastructure Report, unsealed outdoor concrete surfaces experience surface degradation up to 3.5 times faster than properly sealed equivalents in climates with four seasons. In sunbelt states, UV-induced surface chalking can begin in as few as 18 months on unsealed concrete.
In 2026, extreme weather variability has become a mainstream concern for homeowners. With temperature swings becoming more erratic across North America — including record freeze events as far south as Texas — the expansion-contraction stress on porous concrete has increased significantly. A properly applied sealer doesn’t just beautify; it literally acts as a shock absorber for your concrete’s cellular structure.
The financial case is equally compelling. The average cost to replace a 400 sq ft concrete patio in the U.S. in 2026 runs between $3,200 and $6,800. A professional-grade sealing job for the same surface costs between $280 and $650 in materials alone. That’s a protection ratio no responsible homeowner should ignore.
Understanding Concrete Sealer Types
Walk into any home improvement store in 2026 and you’ll find at least a dozen sealer products. Most homeowners grab whatever is on the end cap display. That’s the first mistake. The sealer you choose determines not just how your concrete looks, but how long the protection lasts and how much maintenance you’ll be doing down the road.
Penetrating Sealers: The Long-Game Option
Penetrating sealers — including silane, siloxane, and silane-siloxane blends — chemically bond with the concrete substrate rather than sitting on top of it. They don’t change the appearance of your concrete (no gloss, no color enhancement), but they offer exceptional moisture protection and typically last 5–10 years without recoating.
These are ideal for driveways, sidewalks, and surfaces that see heavy traffic or harsh winters. In 2026, silane-siloxane hybrid formulas from brands like Ghostshield (Armor S2000) and RadonSeal have become the gold standard for freeze-thaw prone regions, with penetration depths reaching up to 4 inches in porous concrete mixes.
Best for: Driveways, high-traffic walkways, northern climates, natural-look preference
Reapplication interval: 5–10 years
Average cost (2026): $0.18–$0.35 per square foot
Acrylic Sealers: The Aesthetic Workhorse
Acrylic sealers — both water-based and solvent-based — form a surface film that enhances color, adds gloss, and provides moderate moisture and stain protection. They’re the most popular choice for patios, pool decks, and decorative concrete because they dramatically improve visual appeal with that classic “wet look” or satin finish.
Water-based acrylics have surged in popularity since tighter VOC regulations came into effect in most U.S. states between 2024 and 2025. They’re easier to apply, safer to use, and have improved significantly in durability. However, they typically require reapplication every 2–3 years on outdoor surfaces.
Solvent-based acrylics penetrate slightly deeper and tend to produce a richer color enhancement, but they require more careful handling and ventilation. In California, Texas, and several northeastern states, solvent-based formulas above 100g/L VOC are now restricted for residential use as of 2025 regulations.
Best for: Decorative patios, stamped concrete, pool decks, surfaces where appearance matters
Reapplication interval: 2–3 years
Average cost (2026): $0.10–$0.28 per square foot
Epoxy and Polyurethane Sealers: Maximum Durability
These two-component or high-solids sealers form an extremely thick, hard film over the concrete surface. Epoxy coatings are exceptional at resisting oil, chemicals, and heavy mechanical abrasion, which is why they dominate garage floors and commercial settings. Polyurethane topcoats are often applied over epoxy as a UV-stable finish layer, since epoxy alone yellows outdoors.
For outdoor residential use in 2026, 100% polyaspartic coatings — a next-generation polyurea variant — have largely replaced traditional epoxy-polyurethane systems in premium applications. They cure faster (sometimes within hours), handle UV exposure without yellowing, and achieve commercial-grade hardness on patios and driveways.
Best for: Garage floors, high-abuse areas, commercial-look residential spaces
Reapplication interval: 5–10 years (polyaspartic)
Average cost (2026): $0.45–$1.20 per square foot
Tools and Materials You’ll Actually Need
One of the most common reasons DIY sealing projects fail is inadequate equipment. Here’s the non-negotiable toolkit for a professional result:
- Pressure washer (1,800–3,500 PSI): For aggressive cleaning and surface prep. Electric models work; gas models are faster on larger areas.
- Concrete degreaser/cleaner: pH-neutral cleaners for general cleaning; alkaline degreasers for oil stains; acidic etchers (muriatic or phosphoric acid) for mineral stains and surface prep.
- Concrete etching solution or mechanical grinder: Opens the concrete pores for proper sealer adhesion — this step is skipped by most DIYers and ruins the final result.
- Stiff-bristle scrub brush or floor machine: For working cleaning solution into the surface.
- Pump garden sprayer or commercial airless sprayer: For applying penetrating sealers evenly.
- 3/8″ nap roller and extension pole: For applying acrylic or film-forming sealers.
- Push squeegee: For spreading and working sealer into low spots.
- Moisture meter: Critical for confirming concrete dryness before sealing (concrete must be below 4% moisture).
- Safety gear: Chemical-resistant gloves, safety goggles, rubber boots, and respiratory protection appropriate to the sealer type.
Pro Tip: Rent a floor buffer with a scrubbing pad from your local hardware store for large flat areas. It does in 20 minutes what a hand scrub takes 2 hours to accomplish, and it preps the surface more consistently.
The Pro-Level Cleaning Process
Think of concrete cleaning not as a chore, but as surgery. The surface preparation accounts for roughly 80% of your final result. A sealer applied to a dirty, contaminated, or damp surface will fail — period. Here’s the step-by-step process professionals follow:
Step 1: Initial Assessment and Repair
Before water touches your concrete, do a thorough walkthrough. Look for:
- Cracks wider than 1/4 inch (repair with flexible polyurethane crack filler, not rigid cement)
- Spalling or flaking sections
- Oil or grease stains (dark, penetrating spots)
- Efflorescence (white powdery deposits from mineral salts)
- Existing sealer that may be failing (peeling, blistering, or whitish haze)
If existing sealer is present, you have a decision to make. Applying new sealer over old failed sealer is one of the top mistakes contractors see. Use a chemical sealer stripper or a mechanical grinder to remove failing coatings completely. Xylene-based strippers work on most acrylic sealers; for epoxy or polyurethane, mechanical grinding is typically required.
Step 2: Deep Degreasing
Apply a concentrated alkaline degreaser (like Simple Green Heavy Duty or Zep Commercial Concrete Cleaner) to the entire surface, focusing on stained areas. Let it dwell for 10–15 minutes, then scrub aggressively with a stiff-bristle push broom or floor machine. Rinse thoroughly with your pressure washer.
For stubborn oil stains: apply kitty litter or an oil-absorbent compound for 24 hours before degreasing. This lifts the upper oil layer before chemical treatment. Multiple applications of degreaser may be needed for heavily soaked stains.
Step 3: Pressure Washing
Pressure wash the entire surface at 2,500–3,000 PSI using a rotating turbo nozzle or surface cleaner attachment. Work in overlapping passes to ensure even cleaning. For residential concrete (typically 3,000–4,000 PSI compressive strength), avoid going above 3,500 PSI with a zero-degree nozzle as it can etch the surface unevenly.
Surface cleaners — the spinning disc attachments — are worth every penny for flat areas. They eliminate the stripe marks that a wand nozzle creates and clean 4x faster on open surfaces.
Step 4: Etching for Sealer Adhesion
This is the step most DIYers skip, and it’s the reason so many sealing projects fail within the first year. Etching opens the concrete’s pore structure so the sealer can properly bond and penetrate.
Apply a 10% muriatic acid solution or a concrete etching product (phosphoric acid-based etchers are gentler and more controllable) to the damp surface. The solution will fizz — that’s normal, it means it’s reacting with the concrete. Let it dwell for 5–10 minutes, scrub, then neutralize with a baking soda solution (1 cup per gallon of water) and rinse completely.
Safety critical: Wear acid-resistant gloves, eye protection, and rubber boots. Work in small sections. Ensure good air circulation.
Step 5: Complete Drying
This is the most patience-demanding step. Concrete must be completely dry before sealing — typically 24–48 hours after final rinsing, depending on temperature and humidity. Use a plastic sheet test: tape a 12″x12″ piece of plastic to the concrete and leave it for 24 hours. If moisture collects underneath, it’s not ready. A moisture meter reading below 4% is your green light.
How to Seal Outdoor Concrete Like a Professional
With a properly cleaned, etched, and dried surface, you’re now in the best possible position. Here’s how professionals apply each major sealer type:
Applying Penetrating Sealers
Penetrating sealers are applied generously with a pump garden sprayer in a flood-coat method. Work in 10-foot-wide sections. Apply a heavy, even coat and allow it to penetrate for 5–10 minutes, then apply a second light coat over the still-wet first coat. Use a brush or squeegee to spread any pooling sealer — pooled penetrating sealer will dry as a white haze. Buff any remaining surface residue with a clean dry roller before it dries completely.
Applying Acrylic Sealers
Water-based acrylic sealers go on with a 3/8″ nap roller and extension pole. Apply in thin, even coats — resist the urge to apply thickly, as thick coats trap air and create bubbles or whitish haze known as “blushing.” Apply the first coat, allow it to dry to touch (typically 1–2 hours), then apply a second coat perpendicular to the first. Two thin coats always outperform one thick coat.
Temperature matters enormously here: apply when temperatures are between 50°F and 90°F (10°C–32°C), with no rain expected for at least 24 hours. Morning application in summer is ideal — you avoid peak heat and afternoon humidity spikes.
Case Study — Suburban Atlanta Patio Restoration (2025): A homeowner in Marietta, Georgia, spent three weekends trying to seal a 600 sq ft stamped concrete patio with a solvent-based acrylic sealer in August. The sealer blushed white across 40% of the surface because afternoon humidity shot above 85% while the sealer was still curing. The fix required stripping and resealing with a water-based formula applied in early morning hours. Lesson: check your dew point, not just temperature.
Applying Polyaspartic Coatings
These are not for the faint-hearted DIYer. Polyaspartic coatings have working times as short as 20–30 minutes in warm conditions. You must mix, broadcast any decorative chips, and back-roll efficiently. For areas over 200 sq ft, two people are essentially required. Follow manufacturer mixing ratios precisely — polyaspartic chemistry doesn’t forgive improvisation. Many homeowners opt for professional application here, which in 2026 typically costs $2.50–$5.00 per sq ft installed.
3 Common Challenges (and How to Beat Them)
Challenge 1: Sealer Blushing (White Haze)
Blushing is the most frequently reported sealing problem. It happens when moisture becomes trapped under or within a curing acrylic film — usually from high humidity, cold temperatures, or applying sealer over damp concrete. Mild blushing can sometimes be corrected by applying xylene with a roller to re-dissolve and re-lay the sealer film. Severe blushing requires full stripping and reapplication. Prevention is far better: use a moisture meter, check weather forecasts for 48 hours, and apply in optimal conditions.
Challenge 2: Peeling and Flaking
Peeling sealer is almost always caused by one of three things: inadequate surface prep, sealer applied over a contaminated surface, or incompatible sealer layering. If a previous silicone-based or penetrating sealer is still active in the concrete, film-forming acrylics cannot bond properly and will peel within weeks. Always test for existing sealers by dripping water on the surface — if it beads, a sealer is present and must be addressed before applying a new film-former.
Challenge 3: Uneven Color or Lap Marks
Lap marks — visible lines where roller strokes overlap — are the telltale sign of amateur application. They happen when sealer begins to tack up before the next pass overlaps it. Work in manageable sections, maintain a wet edge at all times, and overlap each pass by at least 50% while the prior section is still wet. On hot days, work in smaller sections and consider starting at 7:00 AM when temperatures are lower and the sealer has more working time.
Case Study — Phoenix Pool Deck, 2025: A Scottsdale homeowner hired a handyman (not a concrete specialist) to seal her 900 sq ft travertine-look broom-finish concrete pool deck. The result: severe lap marks visible at every angle in direct sunlight, plus three areas of lifted sealer where the concrete had residual pool water saturation. A certified concrete coatings contractor assessed the damage and estimated $800 in stripping and redo costs. The original sealing job cost $320 in materials. This is precisely why prep and technique matter more than product choice alone.
Concrete Sealer Comparison Table
| Sealer Type | Durability | Reapplication | Appearance Change | DIY Friendliness |
|---|---|---|---|---|
| Silane-Siloxane Penetrating | 5–10 years | Low frequency | None (invisible) | ★★★★★ |
| Water-Based Acrylic | 2–3 years | Moderate | Low sheen / satin | ★★★★☆ |
| Solvent-Based Acrylic | 3–5 years | Moderate | High gloss / wet look | ★★★☆☆ |
| Epoxy Coating | 5–7 years | Low frequency | High gloss / opaque | ★★☆☆☆ |
| Polyaspartic Coating | 8–12 years | Very low | Satin to high gloss | ★☆☆☆☆ |
Effectiveness by Sealer Type: Visual Breakdown
The following chart compares overall protection effectiveness scores (rated 1–100) based on a composite of moisture resistance, UV protection, abrasion resistance, and longevity — drawn from independent testing data published by the Concrete Decor Institute in 2025:
Overall Protection Score by Sealer Type (out of 100)
Source: Concrete Decor Institute composite testing data, 2025. Scores reflect outdoor residential applications over 36-month evaluation periods.
Maintenance: Keeping Your Sealed Concrete Looking Great Year-Round
Sealing isn’t a set-it-and-forget-it solution. Professional maintenance is what keeps your investment paying dividends for years. Here’s a practical annual maintenance schedule:
- Monthly: Sweep debris and rinse with a garden hose. Standing leaves and organic material create tannin staining that penetrates sealers over time.
- Quarterly: Spot-clean oil drips, tire marks, or food stains with a pH-neutral concrete cleaner and a soft brush. Avoid bleach — it degrades acrylic sealers.
- Annually: Do a thorough inspection. Check for areas where the sealer is thinning (do a water-bead test). Light traffic areas of acrylic sealers may need a maintenance coat after 2 years.
- Every 2–3 years: Re-apply a maintenance coat of compatible sealer to acrylic-sealed surfaces. Clean, but don’t strip — just lightly abrade with a soft scrub pad, clean, dry, and recoat.
- Every 5–10 years: Full strip, assessment, and resealing for high-durability systems. Penetrating sealers may simply need reapplication with no stripping required.
Pro Tip: Keep a small quantity of your original sealer in a sealed container in a cool, dark space. Most sealers remain usable for 2–3 years after opening. This allows you to do quick spot repairs without needing to re-seal an entire surface.
Frequently Asked Questions
How long should I wait before sealing new concrete?
New concrete needs adequate time to cure before sealing. The minimum recommended waiting period is 28 days for standard portland cement mixes — this allows the concrete to reach approximately 90% of its design compressive strength. Sealing too early traps bleed water and residual cure moisture, which leads to blushing, poor adhesion, and premature failure. In 2026, some accelerated concrete mixes with chemical cure accelerators can reach adequate moisture levels in 14–21 days, but always verify with a moisture meter before proceeding. If you’re using a penetrating sealer only, some manufacturers allow application as early as 21 days on properly dried new concrete.
Can I seal concrete myself, or should I hire a professional?
Penetrating sealers and water-based acrylic sealers are genuinely DIY-friendly if you follow proper prep protocols. These products forgive minor application inconsistencies and can be corrected if something goes wrong. Solvent-based acrylics, epoxy systems, and polyaspartic coatings are progressively more demanding and less forgiving of technique errors — professional application is strongly advisable for the latter two, especially on surfaces over 300 square feet. The cost of a professional concrete coatings contractor in 2026 averages $1.75–$4.50 per square foot for application including materials, which is frequently worth it for complex or large-scale projects when weighed against the cost of redoing a failed DIY job.
Why is my sealed concrete turning white or slippery?
Two separate issues, both important. White discoloration (blushing or cloudiness) is almost always moisture-related — sealer was applied over damp concrete or during high-humidity conditions. Mild cases can be treated with xylene applied by roller on acrylic sealers to re-dissolve and reset the film. Severe cases need stripping. Slippery surface is a safety issue caused by film-forming sealers creating a smooth, low-traction surface — especially dangerous when wet near pools or in rain. Fix it by applying an anti-slip additive (aluminum oxide or polymer grip beads) to the next sealer coat. Many manufacturers offer pre-mixed anti-slip versions of their sealers in 2026; this is now considered best practice for any outdoor surface where people walk barefoot or in wet conditions.
Your Pro Concrete Action Plan: What to Do This Weekend
You’ve got the knowledge. Now let’s make it actionable. Here’s exactly how to move from reading to results:
- Assess your surface this week: Walk your concrete, do the water-bead test, check for cracks, and identify stain types. Write it down. This 20-minute exercise dictates every product decision that follows.
- Choose your sealer based on your actual goals: Durability and invisibility? Go penetrating. Appearance and color enhancement? Go acrylic. Maximum longevity and don’t mind hiring a pro? Consider polyaspartic. Stop browsing; commit.
- Schedule your project day strategically: Pick a day with 24 hours of dry weather forecast, temperatures between 55°F and 85°F, and start no later than 8:00 AM. Morning application is your best friend outdoors.
- Invest in proper prep: Rent a floor buffer if your surface exceeds 300 sq ft. Use a moisture meter — they cost $30–$60 and pay for themselves the first time they prevent a failed sealing job. Don’t skip the etch.
- Apply thin, even coats and be patient: Two coats, perpendicular passes, wet edge maintained. Then stay off the surface for the manufacturer’s recommended cure time — usually 24–72 hours depending on the product.
As outdoor living continues to be one of the highest-return home improvement categories in 2026 — with patios, pool decks, and outdoor kitchens driving significant property value increases — well-maintained sealed concrete is no longer just a maintenance task. It’s part of your home’s value story.
Here’s the question to sit with: How much money has your concrete already lost you in degradation, and what’s it going to cost if you wait another season to act? The materials to properly seal a 500 sq ft patio cost less than a single dinner out. The cost of replacing that patio? That’s a different conversation entirely.
Your concrete floor is speaking to you every day — cracks, stains, and fading are its way of asking for help. Now you know exactly how to answer.
About the Author
