Complete Home Renovation Checklist for Patios and Sunroom Floors
Reading time: 14 minutes
Ever stood on a cracked, weathered patio slab wondering whether a full renovation is worth the hassle — or the cost? You’re in excellent company. In 2026, outdoor living and sunroom additions remain one of the top home improvement investments in North America, with homeowners collectively spending over $47 billion annually on patio and sunroom upgrades. Yet the majority of renovation projects still hit avoidable snags: wrong material choices, skipped subfloor prep, or mismatched indoor-outdoor transitions.
Here’s the honest truth: a successful patio or sunroom floor renovation isn’t about buying the most expensive tile or hiring the biggest contractor. It’s about strategic planning, the right sequence of steps, and knowing which corners you simply cannot cut.
This guide walks you through every critical phase — from the initial assessment to the final sealant coat — with practical checklists, real-world examples, and the kind of expert insight that transforms a stressful project into a satisfying, lasting result.
Table of Contents
- Why Patio and Sunroom Floors Deserve Special Attention
- Phase 1: Pre-Renovation Assessment Checklist
- Phase 2: Material Selection — Making the Right Call
- Phase 3: Subfloor and Surface Preparation
- Phase 4: Installation Checklist
- Phase 5: Finishing and Sealing
- Common Challenges and How to Overcome Them
- Cost and ROI Comparison by Material Type
- Frequently Asked Questions
- Your Patio and Sunroom Renovation Roadmap Forward
Why Patio and Sunroom Floors Deserve Special Attention
Patios and sunrooms occupy a unique architectural zone — they’re neither fully outdoors nor fully indoors. This in-between status creates a specific set of engineering and design challenges that standard interior flooring guides simply don’t address. In 2026, with climate variability increasing across most U.S. climate zones, materials that seemed perfectly adequate five years ago are showing premature wear and moisture-related failure at notably higher rates.
According to the National Association of Home Builders (NAHB) 2025 Annual Report, moisture intrusion and thermal expansion are the two leading causes of patio and sunroom floor failures, accounting for nearly 68% of all structural complaints in these spaces. That’s not a small number — and it’s largely preventable with proper planning.
Think about it this way: your sunroom floor might experience a 90°F summer afternoon followed by a 28°F winter morning. Every material you choose must accommodate that swing, maintain traction when wet, resist UV degradation, and still look beautiful enough to justify your investment. That’s a demanding job description.
“The number one mistake homeowners make is treating a sunroom like an interior room and a patio like a sidewalk. Neither is accurate, and both lead to expensive callbacks.” — Sandra Klemm, Certified Flooring Inspector and NWFA member, 2025
Phase 1: Pre-Renovation Assessment Checklist
Before you pull a single tile or pour a cubic yard of concrete, your assessment phase determines whether your renovation succeeds or becomes a costly redo. This is your diagnostic foundation — treat it seriously.
Structural and Site Evaluation
Start outdoors and work inward. A thorough structural assessment should cover the following:
- Check existing slab condition: Look for cracks wider than 1/8 inch, heaving sections, or low spots where water pools. Minor hairline cracks are often cosmetic; structural cracks need engineering review before any surface work begins.
- Measure slope and drainage: Patios should slope a minimum of 1/8 inch per foot away from the house foundation. Any slope toward the foundation is a red flag requiring correction before flooring installation.
- Test for moisture: Tape a 24-inch square of plastic sheeting to the existing slab for 48 hours. Condensation on the underside indicates rising moisture — a critical finding that changes your material choices entirely.
- Assess sunroom subfloor type: Is it a wood frame floor, a concrete slab, or a crawl space system? Each requires a different preparation approach and limits your material options differently.
- Identify existing material: Old vinyl, ceramic tile, or painted concrete each presents different removal challenges and may contain materials (like asbestos in pre-1990 adhesives) requiring professional abatement.
- Note sun exposure and climate zone: South- and west-facing sunrooms experience the most UV and thermal stress. USDA hardiness zones 3–5 face freeze-thaw cycles that demand frost-resistant materials rated for outdoor use.
Permit and Code Verification Checklist
This step gets skipped more often than it should — and the consequences can include forced removal, failed home sales, and insurance voidance. In 2026, most municipalities require permits for:
- Any structural modification to an existing patio (including adding drainage systems)
- Sunroom additions or enclosures exceeding 200 square feet in most jurisdictions
- Electrical work associated with heated floor systems
- Changes to load-bearing elements beneath sunroom floors
Pro Tip: Call your local building department before you finalize any design plan. A 15-minute conversation now can save you weeks of permit remediation later. Many municipalities in 2026 offer online permit portals where you can check requirements by project type without ever picking up a phone.
Phase 2: Material Selection — Making the Right Call
Material selection is where most homeowners either save or sink their renovation budget. The right choice depends on your specific conditions: climate, traffic level, aesthetic goals, and maintenance capacity. Let’s break down the most relevant options for 2026.
The Top Five Materials for Patios and Sunroom Floors in 2026
1. Porcelain Tile (Large Format)
Large-format porcelain (24×24 or 24×48 inch slabs) dominated renovation projects in 2025 and continues to lead in 2026. Why? Modern through-body porcelain achieves water absorption rates below 0.5%, making it virtually impervious to moisture damage. Rated PEI 4 or 5 for commercial traffic, it handles outdoor abuse without flinching. The key: choose tiles specifically rated for outdoor or frost-resistant use — not all porcelain qualifies.
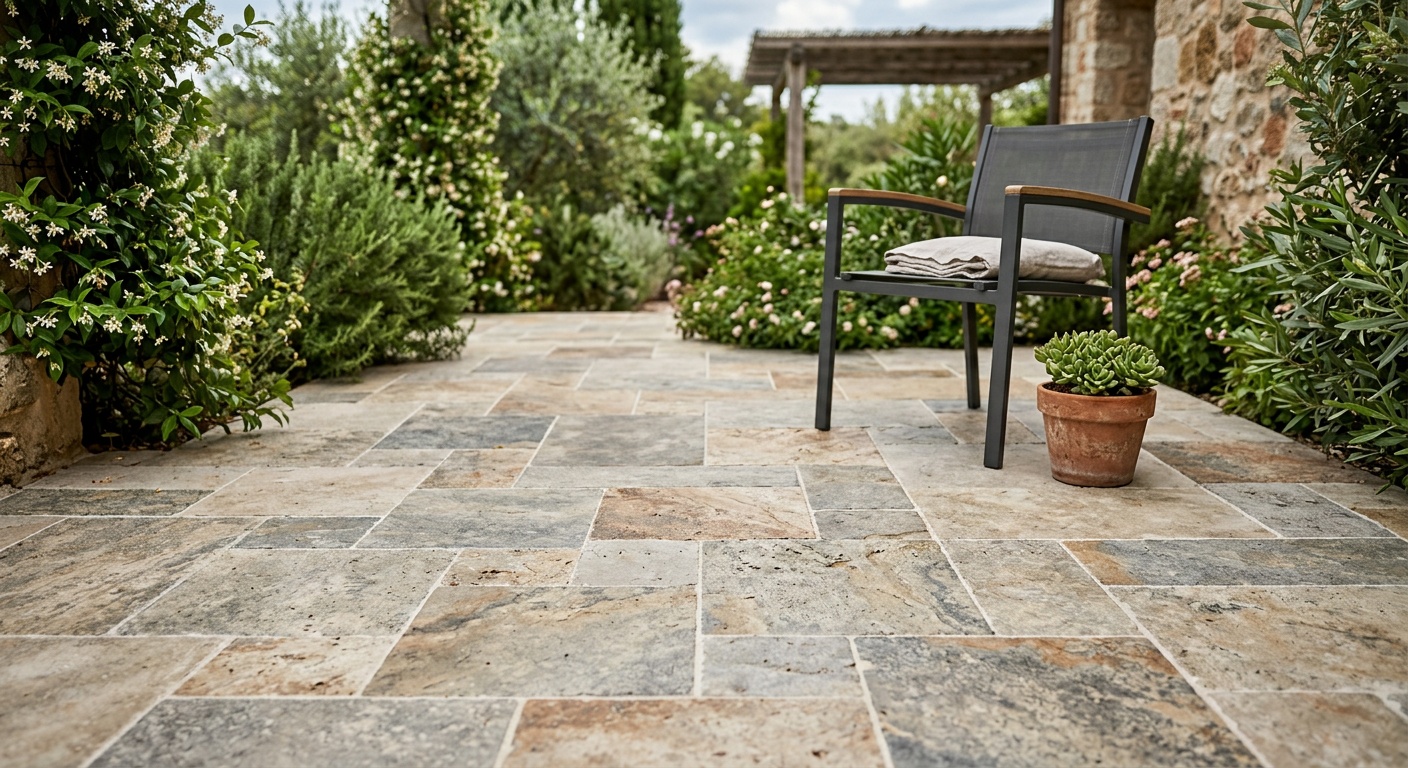
2. Natural Stone (Travertine, Bluestone, Slate)
Natural stone delivers unmatched visual warmth and remains a top choice for premium sunrooms. The tradeoff: it requires sealing every 1–3 years depending on porosity, and softer stones like travertine can chip in high-traffic outdoor settings. Bluestone and slate are significantly more durable for patios exposed to weather.
3. Composite Decking Planks
For sunroom floors with wood-frame subfloors or elevated patios, next-generation composite decking products (like those with full PVC capstock technology) offer the look of wood with dramatically better moisture and UV resistance. In 2026, leading brands now offer 30-year warranties — a significant improvement over the 15-year products available five years ago.
4. Concrete Overlays and Microcement
Microcement systems saw a massive surge in popularity through 2025 and into 2026, particularly for enclosed sunrooms. Applied at just 2–3mm thickness over an existing slab, microcement creates a seamless, contemporary surface that mimics polished concrete without the cost of full demolition. Critical note: microcement is not suitable for fully exposed outdoor patios — UV degradation and freeze-thaw cycling will cause premature failure.
5. Luxury Vinyl Tile (LVT) — Commercial Grade
For temperature-controlled, enclosed sunrooms only, commercial-grade LVT with a wear layer of 20 mil or more offers excellent comfort underfoot, water resistance, and design flexibility. It is not appropriate for outdoor patios or unheated sunrooms in cold climates, where the material can crack under extreme temperature swings.
Phase 3: Subfloor and Surface Preparation
If there’s a single phase that separates successful renovations from failed ones, this is it. Skipping or rushing subfloor preparation is the primary reason why beautiful, expensive new flooring fails within 2–3 years.
Concrete Slab Preparation — Step by Step
- Step 1 — Clean thoroughly: Pressure wash the slab, remove all paint, adhesive residue, efflorescence, and biological growth (moss, algae). Use a concrete degreaser on oil-stained areas.
- Step 2 — Repair cracks and voids: Fill structural cracks with a flexible polyurethane caulk. Fill surface cracks and spalls with a Portland cement-based patching compound. Allow full cure time — minimum 72 hours before proceeding.
- Step 3 — Grind high spots: Use an angle grinder with a diamond cup wheel to level ridges, paint drips, or old adhesive humps. High spots in the substrate telegraph through finished flooring within months.
- Step 4 — Apply self-leveling compound if needed: Any low areas exceeding 3/16 inch over 10 feet must be filled with a self-leveling underlayment. This is a non-negotiable step for large-format tile and stone installations.
- Step 5 — Apply moisture barrier or primer: Based on your plastic sheet test from Phase 1, apply an appropriate moisture mitigation system. For RH readings above 85% (measured with an in-slab hygrometer), a two-component epoxy moisture barrier is required before any adhesive application.
Wood Frame Subfloor Preparation for Sunrooms
Wood frame sunroom floors introduce deflection challenges. Tile and stone require an extremely stiff substrate — any flex causes grout and tile to crack over time. Industry standard (per the Tile Council of North America, or TCNA) requires deflection of no more than L/360 (span in inches divided by 360) for ceramic tile, and L/720 for natural stone.
- Check and sister any undersized or damaged joists before proceeding.
- Install a minimum 3/4-inch tongue-and-groove plywood subfloor, followed by a 1/2-inch cementitious backer board screwed at 6-inch intervals for tile installations.
- For LVT and composite flooring, a single layer of high-quality 3/4-inch plywood is typically sufficient — but confirm with the manufacturer’s installation specifications.
- Ensure all subfloor panels are properly acclimated to the space’s average temperature and humidity before installation begins.
Phase 4: Installation Checklist
With your substrate properly prepared, installation becomes significantly more straightforward. Use this checklist as your real-time guide during the installation process.
Before You Begin Installing:
- ✅ Confirm temperature requirements: most tile mortars require 50–95°F ambient and surface temperature during installation and for 72 hours after.
- ✅ Dry-lay your pattern across the full area before committing any adhesive. This is especially critical for large-format tiles where calibration differences between batches can create visible lippage.
- ✅ Snap chalk lines for reference guides — never use walls as your straight-line reference. Walls are rarely truly square.
- ✅ Confirm all materials are from the same production lot/batch number. Color variation between batches is a common and frustrating discovery mid-installation.
- ✅ Plan your exit route — know which direction you’ll be working to avoid tiling yourself into a corner.
During Installation:
- ✅ Use the correct trowel notch size for your tile format. Large-format tiles (18 inches or larger) require a minimum 1/2-inch x 1/2-inch square-notch or 3/4-inch V-notch trowel.
- ✅ Back-butter tiles in addition to the substrate (“back-butter” means applying a thin skim coat to the tile’s back). This ensures full mortar contact and prevents hollow spots.
- ✅ Check for lippage (height difference between adjacent tiles) every 4–5 tiles using a straightedge and feeler gauge. Maximum acceptable lippage for most residential applications is 1/32 inch.
- ✅ Leave expansion joints at all perimeter walls, columns, and over any existing control joints in the substrate. These joints must remain open and be filled with a flexible sealant — never grout.
- ✅ For outdoor patio installations, leave a minimum 1/8-inch gap between tiles to accommodate thermal expansion. Outdoor spaces experience dramatically greater temperature fluctuation than interiors.
Phase 5: Finishing and Sealing
The finishing phase is where the visual transformation happens — and where long-term durability is either secured or compromised. Don’t rush this stage after the effort you’ve invested in everything before it.
Grouting: Select your grout type carefully. For joints wider than 1/8 inch, sanded grout is required; for narrower joints, unsanded. For outdoor patios and wet-area sunrooms, consider an epoxy grout — it’s harder to work with but delivers dramatically superior stain and moisture resistance that pays dividends over a 10–15 year lifecycle.
Sealing — The Non-Negotiable Step: Apply penetrating sealer to:
- All natural stone surfaces (travertine, slate, limestone, bluestone)
- Unpolished or textured porcelain used outdoors
- All grout joints in outdoor and semi-outdoor applications
- Concrete overlays and microcement surfaces
For outdoor applications, reapply sealer annually or biannually depending on traffic and UV exposure. Set a calendar reminder — this simple maintenance step extends floor life by years.
Common Challenges and How to Overcome Them
Challenge 1: Managing Temperature Extremes
Consider the experience of a homeowner in Minneapolis who renovated their three-season porch in 2024 using standard interior porcelain tile. By spring 2025, they had 14 cracked tiles and failed grout joints throughout. The diagnosis: non-frost-rated tile combined with insufficient expansion joint spacing. The solution required full removal and reinstallation — a $6,200 lesson.
The fix is straightforward: always verify the tile’s frost rating (ASTM C1026 or equivalent ISO standard) for any space that drops below freezing. Space expansion joints at a maximum of 20–25 feet in each direction for outdoor tile installations, and at every change of plane.
Challenge 2: Moisture Migration from Below
A sunroom renovation project in Atlanta in 2025 saw beautiful new LVT flooring begin to bubble and delaminate within four months of installation. The culprit: an undetected high relative humidity reading in the slab (92% RH) combined with an adhesive system not rated for elevated moisture conditions.
Prevention: always test slab moisture with a calibrated in-slab hygrometer per ASTM F2170 — not just a surface calcium chloride test, which only measures surface moisture. Know your numbers before committing to any adhesive or flooring system.
Challenge 3: Uneven Transitions Between Sunroom and Interior
One of the most overlooked design challenges is the floor height transition between a sunroom and the adjacent interior living space. When a sunroom gets a new tile floor over a concrete overlay, the finished floor height can rise 1.5–2 inches — creating a tripping hazard and aesthetic discontinuity.
Plan your floor build-up thickness before material selection. If height matching is a priority, thinner systems (microcement, direct-bond LVT) offer more flexibility than traditional tile-over-mortar-bed assemblies.
Cost and ROI Comparison by Material Type
| Material | Avg. Installed Cost (2026) | Expected Lifespan | Maintenance Level | Estimated ROI |
|---|---|---|---|---|
| Frost-Rated Porcelain Tile | $12–$22/sq ft | 25–40 years | Low | 70–85% |
| Natural Bluestone / Slate | $18–$35/sq ft | 30–50+ years | Medium | 75–90% |
| Composite Decking Planks | $14–$28/sq ft | 20–30 years | Very Low | 65–80% |
| Microcement / Concrete Overlay | $8–$18/sq ft | 10–20 years | Medium-High | 60–75% |
| Commercial-Grade LVT (Sunroom Only) | $6–$14/sq ft | 10–20 years | Low | 55–70% |
Material Popularity Among 2026 Patio Renovations
Source: Remodeling Magazine Outdoor Living Survey, 2026
Frequently Asked Questions
Can I install tile directly over an existing concrete patio without removing the old surface?
In many cases, yes — but only if the existing slab is structurally sound, free of active cracks, and passes a moisture test. The slab must be clean, level within 3/16 inch over 10 feet, and have no surface contamination (oil, paint, curing compounds) that would prevent proper mortar bond. If any of these conditions aren’t met, you’ll need to address them before installation. Attempting to tile over a failing or contaminated substrate is the most common cause of early installation failure.
What’s the best flooring option for a sunroom that isn’t climate-controlled year-round?
For an unheated or uncooled sunroom, you need materials that can handle significant temperature swings without cracking, warping, or delaminating. Frost-rated porcelain tile and natural stone (properly sealed) are your most reliable choices. Avoid LVT, microcement, and wood-based products in uncontrolled environments — all three have thermal limitations that will cause premature failure in spaces that drop below 40°F or exceed 110°F consistently. If you’re in USDA zones 3–6, prioritize frost resistance as a non-negotiable specification.
How long should I wait after installing tile before I can use the space normally?
Standard thin-set mortar requires a minimum 24–48 hours of cure time before light foot traffic. Grout installation should follow no sooner than 24 hours after tile installation (allow the mortar to fully cure). After grouting, allow another 24–72 hours before foot traffic, and a full 28 days before heavy furniture is placed or the space is used for heavy entertaining. For exterior applications in cooler temperatures (below 65°F), extend these timelines by 50%. Rushing cure times is a leading cause of tile bonding failure and grout cracking.
Your Patio and Sunroom Renovation Roadmap Forward
You’ve covered a lot of ground — and that’s exactly the point. A well-executed patio or sunroom floor renovation is one of the most rewarding home improvement projects you can undertake, both in immediate lifestyle impact and long-term property value. As outdoor living spaces continue to rise in importance for homebuyers in 2026 and beyond, investing in this area isn’t just a personal comfort decision — it’s a financial one.
Here’s your immediate action plan to move from planning to progress:
- This week: Conduct your Phase 1 assessment. Do the plastic sheet moisture test, measure your drainage slope, and call your local permitting office to confirm requirements for your specific project scope.
- Within two weeks: Select your material and request samples. Live with them in the actual space for 48–72 hours at different times of day before committing. Confirm the material is appropriate for your climate zone and specific application (outdoor, semi-outdoor, or enclosed).
- Before installation begins: Have your substrate professionally evaluated if you have any doubt about its condition. The $150–$300 cost of a qualified inspector’s assessment is insignificant compared to the cost of a failed installation.
- During installation: Use this article’s checklist at every phase. Don’t let contractor momentum rush you past critical steps like lippage checks, expansion joint placement, or cure time verification.
- After completion: Set recurring calendar reminders for sealer reapplication and annual inspection of expansion joints and drainage performance. The best floor in the world fails without basic periodic maintenance.
As climate unpredictability continues to intensify across North American regions, the materials and methods you choose today will be tested in ways previous renovation guides didn’t fully anticipate. The homeowners who thrive are those who build resilience into their choices from the start — selecting materials rated beyond minimum requirements, never skipping subfloor preparation, and treating finishing steps like sealing as ongoing investments rather than optional add-ons.
So here’s the question worth sitting with: Is your patio or sunroom floor built to handle the next 25 years — or just the next 25 months? The difference lies entirely in the decisions you make before the first tile is ever set.
About the Author
